
A level RV is more important than you can imagine for comfort, safety, and proper operation of appliances.
Being even slightly off level is very noticeable inside a recreational vehicle, and living with it for days on end during a camping trip can drive you nuts.
That’s why learning how to level your camper when you don’t have a flat parking pad is one of the essential RV skills.
To help you level your travel trailer or motorhome, check out the tips and tricks in this guide. I also share what leveling products get the job done fast so you can start enjoying your RV vacation!
What Happens if Your RV Is Not Level
It’s pretty amazing how much you notice when your RV isn’t level, and annoying problems will haunt you until you straighten it out.
How level does an RV need to be to avoid issues?
To feel comfortable living inside your camper and have appliances, slides, windows, and doors function correctly, your RV needs to be within two degrees of plumb.
For the layperson, this means when you look at a level set on the floor in the middle of your RV, the bubble should be no more than halfway off the center mark when you measure both front-to-back and side-to-side.
While the goal is to have the bubble perfectly in the middle, the chances of that happening at campsites without a cement pad is rare without leveling using jacks or blocks.
Let’s look into why having your RV level is so crucial.
Preventing RV Fridge Damage
RV dual propane and electric refrigerators will quickly malfunction if the unit is more than three degrees out of level. The more level it is, the more efficiently it will run.
RV propane fridges use gravity to move ammonia through the coils. If the camper is tilted, the liquid will pool in one area, which can overheat and possibly even burst open the pipe.
This type of damage can happen in as little as thirty minutes, so you should never plug in your camper and take off to sightsee or hit the pool before leveling up your camper.
What if your RV has a residential fridge?
You may think you’re off the hook having to level up your camper if you have an electric-only compact refrigerator.
Mini-fridges use freon to cool the unit, and even when off, the pooling of the liquid in the coils will cause damage.
When your camper tilts the wrong way, the doors of a residential fridge won’t swing shut and can lead to food loss.
Interior RV Comfort and Safety

Trying to keep your body straight when walking in an unlevel RV is a strain and can lead to slips, especially in the shower.
You’ll also have items falling out when you open cabinets or rolling off the counter or tables.
Sleeping can often be impossible in a tilting RV.
RV Wear and Tear
When an RV isn’t level, it causes damage by stressing the framing, chassis, and tires in specific locations instead of being evenly displaced over the entire unit.
This stress variation causes a slight warping of the walls that can make the operation of slides, windows, and doors difficult.
RV Plumbing Drains Better
RV drains use gravity to empty. If the camper isn’t level, the wastewater can back up and cause smells.
The RV grey and black tank sensors will not accurately read the liquid inside because the RV is tilted.
Must-Have RV Leveling Products
All RVers must have a leveling kit, full of these important items:
- Small levels
- Leveling blocks or ramps
- Wheel chocks
- Stabilizing jacks
- Cordless drill and bits
Small Levels
A circular bullseye level and four straight levels are a requirement for straightforward RV leveling.
The bullseye level is perfect to put inside your fridge, so you’ll know the unit’s within safe level range.
The straight levels will attach to the outside of your camper.
Many people only use two levels, but having one on the back and one on both sides is easier to monitor RV parking no matter where you’re standing.
Leveling Blocks, Ramps, or Chocks
Most RVers use 2×10 wood blocks or purchase plastic leveling block kits.
Lightweight plastic blocks are easy to snap into different configurations for the most leveling flexibility and are easier to clean.
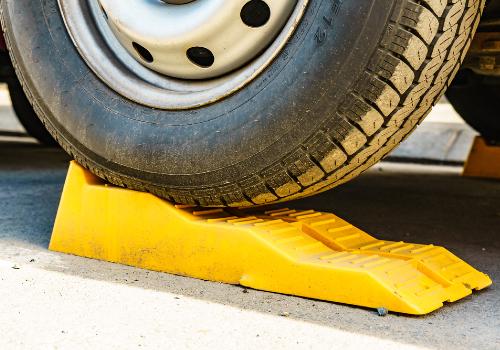
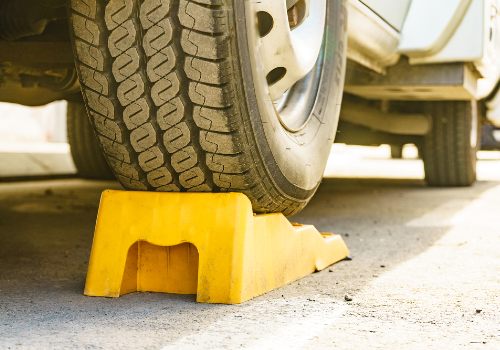
RV leveling ramps are a complete unit that provides different heights to drive your wheels onto to get your camper level.
Leveling chocks are another favorite for travel trailer owners.
Roll the tires onto the curved half of the kit until you reach level, then insert the chock to hold it in place. Consider adding in tire stabilizer jacks for even more security.
Lastly, there are BAL levelers that many RVers find worth the price. This type of RV leveling system doesn’t require moving your trailer onto blocks.
Slip the unit around your tire and lift it by spinning the drive screw. The BAL leveler is only for single-axle travel trailers for side-to-side leveling.
You’ll need to use wheel chocks for a final layer of safety after parking and leveling your recreational vehicle.
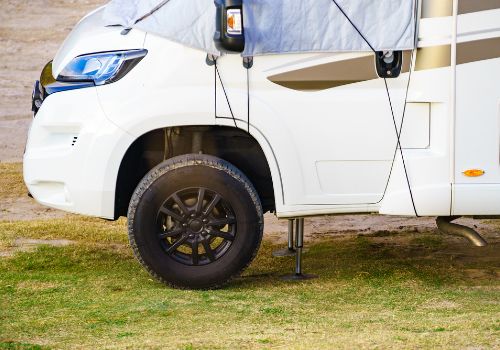
RV Stabilizing Jacks
Stabilizing jacks will decrease camper movement after you level your RV. Stabilizer jacks will not hold the entire weight of your camper but only support the outer edges or underneath slides, so there’s less rocking.
Cordless Drill and Bits
If you use jacks between tires or under your camper, it’s more efficient to use a power drill to open and retract them using a bit that fits your specific jack.
Prepping for Quick RV Leveling
It’s wise to prep your RV by attaching the front-to-back and side-to-side axis levels to the exterior, ensuring your RV is on a flat surface first.
A good trick is to find a flat parking space and use a long carpenters level that aligns with the bottom trim on the side of your camper and again on the back bumper.
Once you find a place where your RV sits even, install your compact levels (with the bubble perfectly centered) to the sides and back of your camper.
Another tip for fast RV leveling is to use cell phones during the parking process. The driver often has difficulty hearing the spotter’s commands over the engine noise, leading to mishaps in getting the tires up on the blocks.
When the driver puts their phone on speaker, it allows the spotter to speak normally (instead of shouting) while giving directions easier for the driver to hear.
How to Level an RV With an Automatic Leveling System
Before you get the pleasure of pushing a button to level your RV, take the time to follow these procedures:
- Unhitch your tow vehicle from a travel trailer
- If your camper has slides, open them
- Place a block underneath each automatic hydraulic jack
After these initial tasks are done, lower the rear levelers. Ensure the jacks don’t overextend, which can strain the mechanisms and cause failure.
If the distance is broad, fill the gap with blocks.
Once the back levelers are good, bring down the front pair. After the trailer is level, use stabilizing jacks and wheel chocks to complete the process.
Automatic Motorhome Leveling
Ensure the front tires point straight and open slides if the coach’s manufacturer suggests it in the manual.
If your motorcoach has airbags, dump them, then go out and chock all your wheels.
Set the ignition key to the accessory position to power the jacks. When you push the auto button on the system, the jacks will automatically deploy and level out the camper.
Some “automatic” RV leveling systems require manual input but are still easier to use over rolling up on blocks.
For these systems, you’ll need to turn the unit on and follow the lights on the display that indicate which jacks need deployment, starting with the side-to-side level.
When you push the button, the individual jack will extend until the unit senses level and alerts you.
Follow with the front-to-back jacks if necessary to even out your camper.
After your RV is level, lower any remaining jacks until they touch the ground for complete stabilization, then turn off the unit and ignition.
Manual RV Leveling for Motorhomes and Travel Trailers
For those who need to level their RV manually, follow the steps below.
How to Level a Motorhome

Once you park your motorhome, take a walk around and check out the levels to see which tires you need to raise.
You always want to keep one, if not both, of your rear tires on the ground at all times.
For side-to-side only leveling, place your blocks next to the tires on the side you need to lift.
Pull forward, slide the blocks into the area the tires were sitting, then back up the coach onto the blocks. Repeat until the rear level indicates the RV is level.
If only the front-to-back axis is off, put blocks under both front tires using the same process as above.
If both of your motorhome axis levels are off, you can often fix the issue by lifting only one back tire.
Want to Connect With a Community of Over 1,078 RV Enthusiasts?
Place blocks under the low-side rear tire until the level on the back of the motorhome shows even. Once you reach that mark, check the side level. More often than not, the whole camper is now even.
If you still aren’t level, add blocks to both front tires until you are.
Trying to control a large and powerful motorhome motion and getting it to stop precisely on a few inches of block isn’t always easy.
The higher the blocks, the more you’ll need to push on the gas to get on top, leading to you overshooting the block. My trick is to use longer blocks or boards, so I have more area for the tires to stop.
When you’re happy with your RV’s position, chock the wheels and extend your stabilizer jacks if you have them.
How to Level a Travel Trailer
Park at the campsite and take a peek at the side-to-side level of your trailer. Don’t unhook from your tow vehicle (unless you’re using a BAL leveler).
If the level bubble is more than half off the center mark, figure out which side of the trailer needs to be higher.
Place your blocks on the ground next to the low-side tire or tires and then pull the trailer forward until the wheels are forward of the blocks.
Push the blocks under the RV, so they now rest in the tires’ previous location, then back up the trailer until the tire (or tires) sit on the blocks.
Check for level. If it’s not enough, pull forward and repeat with more blocks.
Once level, chock the wheels on both sides of the trailer and unhitch from the tow vehicle.
Next, use the jack stand to raise or lower the camper to level out the front-to-back axis. You may need to add a block under your jack for stability on bare ground or make up a significant height difference.
An automatic-leveling jack stand is another nice camping accessory to make this process even faster.
Deploy additional stabilizing jacks if you need them.
5 Bonus Tips for Leveling an RV
1. Have a camping buddy help check for level, place blocks, and communicate with the driver. Manually leveling is much faster when one person moves the RV and the other maneuvers the blocks and gives direction.
2. For motorhomes, always park your front wheels toward low ground. In this position, you can raise the front tires off the ground safely while the rear wheels stay on the ground and lock in place.
3. Use jack pads on asphalt and snow and ice. The pressure of your camper’s weight, plus any warmth from the sun, will cause jacks to sink or slip if you don’t have a buffer.
4. Read the owner’s manual to learn what methods the manufacturer recommends for leveling the camper. Not every RV will have the same leveling procedure, so check for automatic or manual recommendations.
5. Never run up your stabilizer jacks so far that you lift any of your RV tires or leveling jacks off the ground.
RV Leveling FAQs
Can You Use Stabilizer Jacks to Level a Travel Trailer?
Using stabilizers to level an RV is a big no-no and can be very dangerous.
Stabilizer jacks are to support a small portion of your camper’s weight so it won’t sway or jiggle as much when it’s windy, or people move about inside.
RV leveling jacks are rugged and can handle thousands of pounds of weight without failing.
Using stabilizing jacks to level your camper can cause the RV to fall when they give out under excessive weight. The abrupt movement may move the camper off its chocks or injure people or pets inside or outside the RV.
Can I Retrofit an RV to Be Self-Leveling?
Yes, it’s possible to add a self-leveling system to most RVs. The components of an RV automatic leveling system for travel trailers is around $3,000, plus the cost of installation.
Final Thoughts
An unlevel RV equals an unhappy camper and occupants.
For first-time RVers without an automatic-leveling system, expect it to take some practice to find the method and products that work best for your type and size of recreational vehicle.
Once you master the technique, you’ll find the task isn’t complicated and only takes around ten minutes.
When you use the information in this guide, you’ll avoid the pitfalls an uneven RV brings and instead enjoy fun camping adventures!
")


"Man cannot discover new oceans unless he has the courage to lose sight of the shore."
-- Andre Gide


")
